 |
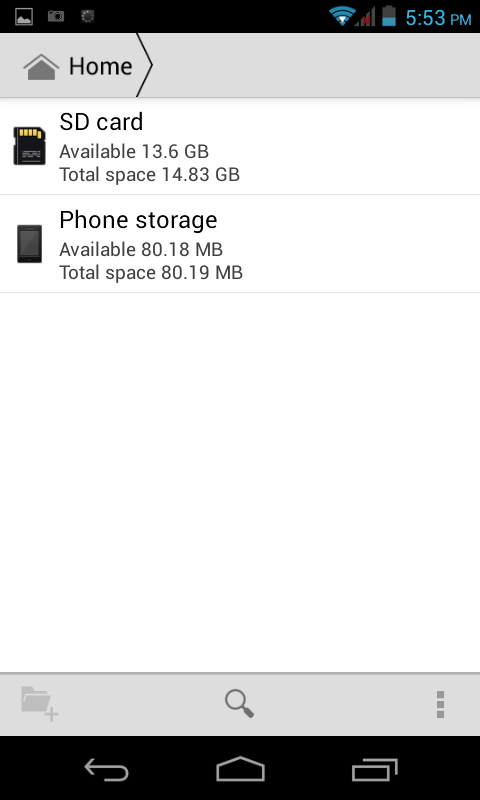
| Phone Storage |
 |
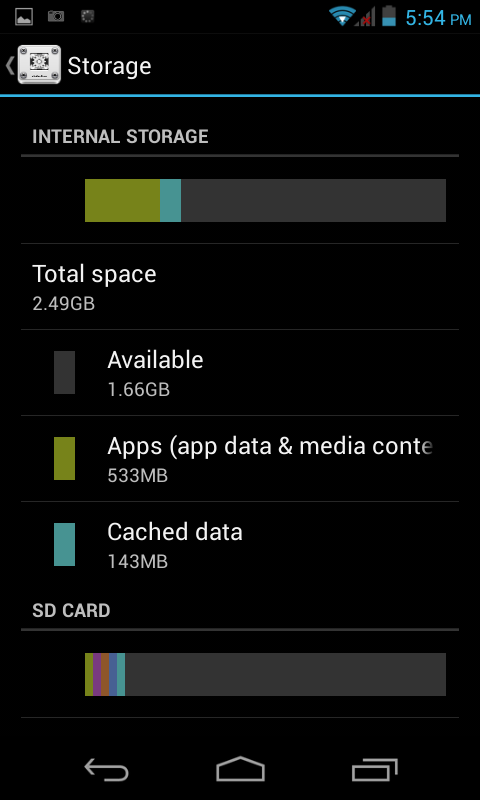
| 2.5gb App Storage |
Modding these tablets, turns out, is much easier then modding the models that have a MBR, EBR1 and EBR2. The models with just one EBR1 instead of two and three is actually very simple, for a simple cheap tablet. Now there is a way to take that $60 tablet and turn it into a $250 tablet.
This particular mod is so easy, it took me more than a month to figure it out. After trying all different Apps offered through
Google Play Store and others located on
XDA developers, nothing seemed to really work, especially for the MTK6572. After reading several articles about modding other MTK tablets, the last being about partitioning, something clicked.
Originally what had gotten the ball rolling was an MBR and EBR1 fie that I had come across on my manufactures website. Their MBR was identical with my tablets MBR, the EBR1 were different. Next, upon flashing the new MBR and EBR1 via SPFlash Tools, it had expanded my internal app storage storage from 512mb to 1.27gb, causing a decrease of my tablet storage from 2.11gb to 1.34gb. According to this
read on XDA, the new discovered MBR/EBR1 was not technically possible, it should not have worked, but it did. From that tutorial, you need to edit your MBR along with your EBR1, in this tutorial, there is no need to play with the MBR, you just need to concentrate on the EBR1.
Next, tried all different math solutions, comparing the original EBR1 with the new EBR1. After reading about using partitioning tools, decided to see what would happen if I were to run some command line based partition tools in linux. That is when I discovered just how the partitions on the MTK6572 tablet works.
****WARNING I WILL NOT BE RESPONSIBLE IF YOU PERMANENTLY BRICK YOUR TABLET/PHONE***
After not having much luck using windows or Cygwin, it became apparent that using, what I could, in linux for a linux based tablet would probably go a long way.
Ubuntu Linux programs you will need are:
- You can root your tablet either using Framaroot or,
- MTKdroid tools from here and, it may or may not allow you to root, if not, then get Framaroot and try, read the tutorial on how to backup your tablet before beginning this mod, MTKdroid tools is what you will need to pull your MBR and EBR1, yes you will need windows, sucks.
- Optional, also, very helpful, a good nandroid backup from the play store, a favorite of mine is nandroid backup this will not pull your EBR1 but is a lifesaver in case of a brick.
- A Hex editor, some are, wxhexeditor, bless hex editor, jeex or Okteta, I'm using Okteta because it highlights the partitioned numbers making it easy to view.
- Google search is a great tool for doing your math solutions, just punch in your numbers in the search bar.
- A partition program to examine your mathematical solutions after you changed your EBR1, gdisk works fine, running the command disktype EBR1 and disktype MBR will give you a good understanding of what type of partitions you are working with. Note, DO NOT bother trying to repartition your EBR1 using a partition tool, it will not work. The partitioning program is going to want to modify your partitions to a recognizable partition, nand partitions are not the same and are not listed in these programs.
Lets inspect our MBR and EBR1, it's good to get familiar at what is being worked on. Now that you have pulled the MBR and EBR1 using MTKDroid Tools, open up a terminal shell, navigate to where the MBR and EBR1 files are and enter:
disktype MBR
The output will be something like, here is mine:
--- MBR
Regular file, size 512 bytes
DOS/MBR partition map
Partition 1: 2.000 TiB (2199023255040 bytes, 4294967295 sectors from 1024)
Type 0x05 (Extended)
Partition 2: 10 MiB (10485760 bytes, 20480 sectors from 18432)
Type 0x83 (Linux)
Partition 3: 10 MiB (10485760 bytes, 20480 sectors from 38912)
Type 0x83 (Linux)
Partition 4: 650 MiB (681574400 bytes, 1331200 sectors from 113152)
Type 0x83 (Linux)
Now lets take a look at your EBR1:
disktype EBR1
--- EBR1
Regular file, size 1 KiB (1024 bytes)
DOS/MBR partition map
Partition 1: 376 MiB (394264576 bytes, 770048 sectors from 1443328)
Type 0x83 (Linux)
Partition 2: 512 MiB (536870912 bytes, 1048576 sectors from 2213376)
Type 0x83 (Linux)
Partition 3: 1.998 TiB (2197353135616 bytes, 4291705343 sectors from 3261952)
Type 0x83 (Linux)
This gives you an idea of how far you can expand your storage, looking at the 2TIB makes you wonder, why would they create an MBR/EBR with a 2TIB capability but my internal storage is 4gb total and the tablet only supports up to 32gb? Well, I'm thinking that this is a versatile used partition scheme used on many different devices, it could also be a potential to increase your internal app storage way beyond 4gb + 32gb with other mods down the road. What we want to focus on at the moment is, how much can partition #2 be increased to install more apps.
Now lets get a look at what the partitions look like, again in terminal type:
gdisk MBR
Press p to print the MBR information
The output will look something like this:
Disk MBR: 1024 sectors, 512.0 KiB
Logical sector size: 512 bytes
Disk identifier (GUID): 8092B769-A758-413F-AB79-CCDB0BC73A2F
Partition table holds up to 128 entries
First usable sector is 34, last usable sector is 990
Partitions will be aligned on 512-sector boundaries
Total free space is 957 sectors (478.5 KiB)
Number Start (sector) End (sector) Size Code Name
2 18432 38911 10.0 MiB 8300 Linux filesystem
3 38912 59391 10.0 MiB 8300 Linux filesystem
4 113152 1444351 650.0 MiB 8300 Linux filesystem
Now enter q to exit
Now lets do the same with the EBR1
gdisk EBR1
Hit p again:
Command (? for help): p
Disk EBR1: 2 sectors, 1024 bytes
Logical sector size: 512 bytes
Disk identifier (GUID): C631D7B1-0586-4F22-A806-1B155BE2BBE7
Partition table holds up to 128 entries
First usable sector is 34, last usable sector is 18446744073709551584
Partitions will be aligned on 512-sector boundaries
Total free space is 18446744069416027584 sectors (8.0 ZiB)
Number Start (sector) End (sector) Size Code Name
1 1443328 2213375 376.0 MiB 8300 Linux filesystem
2 2213376 3261951 512.0 MiB 8300 Linux filesystem
3 3261952 4294967294 2.0 TiB 8300 Linux filesystem
Now press q to exit
What we want to concentrate on is resizing the second partition. For this mod to work, if you look closely, partition three starts one digit higher from where partition two ends. These are the two numbers that we need to increase but make sure that the end of partition two is one digit lower then the beginning of partition three, else, big ole fat BRICK!
Now open the EBR1 using a hex editing program, here is what you need to concentrate on:
0000:01C0 | 00 00 83 00 00 00 00 06 16 00 00 C0 0B 00 00 00 | ...........À....
0000:01D0 | 00 00 83 00 00 00 00 C6 21 00 00
00 10 00 00 00 | .......Æ!.......
0000:01E0 | 00 00 83 00 00 00 00
C6 31 00 FF
39 CE FF 00 00 | .......Æ1.ÿ9Îÿ..
0000:01F0 | 00 00 00 00 00 00 00 00 00 00 00 00 00 00 55 AA | ..............Uª
These are the three values that are going to be increased:
00 10 will be 0x0010
C6 31 will be 0xC631
39 CE will be 0x39CE
For every 512mb we are going to add 10 to all three of those values separately, so if you want to increase your partition to 1.5gb, you will need to add 30 to each section. Lets do this in a Google search, enter your number 0x####+30, you can use the one provided below, mine would be 0x0010+30, yours may be different.
Here my value is 0x2E which the same as 0x002E, so now in the hex editor my
00 10 will become
00 2E, the 00 is going to be the same and the 10 is going to become 2E
The next set of number,
C6 31 is going to become 0xC631, again in the search enter 0x####+30 (0xC631+30)
My new value has gone from
C6 31 to
C6 4F, the C6 has actually stayed the same just like before.
Now for the last two numbers, we are going to do the exact same thing, enter your formula below, ie.
39 CE will be entered as 0x39CE+30
Mine has now went from
39 CE to
39 EC.
Now save your editing under a different name, always keep your original, you can name it what ever you want, I will explain how you can select your new EBR1 without having to make any changes to your scatter.txt in SPFlash Tools, lets save it as 1.5gb-EBR1.
Now we are going to check the values in gdisk, open up terminal shell again and type:
gdisk 1.5gb-EBR1
Disk 1.5gb-EBR1: 2 sectors, 1024 bytes
Logical sector size: 512 bytes
Disk identifier (GUID): 42E75C31-9EF0-47FB-9C59-97DA9BE821CA
Partition table holds up to 128 entries
First usable sector is 34, last usable sector is 18446744073709551584
Partitions will be aligned on 512-sector boundaries
Total free space is 18446744069412095424 sectors (8.0 ZiB)
Number Start (sector) End (sector) Size Code Name
1 1443328 2213375 376.0 MiB 8300 Linux filesystem
2 2213376 5228031 1.4 GiB 8300 Linux filesystem
3 5228032 4298899454 2.0 TiB 8300 Linux filesystem
You will now have new values:
The new values are now higher, make sure, as mentioned earlier, that partition two's End Sector is one digit less then partition three's start sector. Also make sure that no other values have changed from your original EBR1.
Now the fun part, restarting and logging back into windows so that you can access SPFlash tools, yes I know it really sucks!
Fire up SPflash tools, make sure you have selected the correct scatter.txt. When flashing your new EBR1 you are going to need to reflash everything, the new EBR1 is going to erase everything on your phone, which is why a backup and a second backup is very important.
In SPFlash you will see to your right, the location of your original EBR1, click that box on the right as shown below:
A window is now going to open, select your new 1.5gb-EBR1 and flash away!
**NOTE** At the time, am working on a mod that will allow you to extend your storage that will extend to your SDCARD. Have not tried the theory yet, but think that if you extend your EBR1 beyond the total space of your phone storage, for example, if you have 2.5gb of extra phone storage and want to add another 2gb, think it may work using the int2ext mod as shown on some forums.
Downside to this mod, you will not be able to remove or if anything ever happens to your SDCard or your tablet may not boot up, will probably get stuck at the first logo. Another issue is that, this could potentially eat up your SDCard.
Another problem is that, in order for this mod to work, you will need to edit your vold.fstab and save it back to your tablet. Some tablets have the option to adb to your phone once it gets to the boot logo. If this is the case, after flashing the EBR1 you can plug the tablet into the USB port and adb pull /etc/vold.fstab, edit and adb push back.
If you are unable to adb shell at the boot logo, the only other option is to edit your system.img, save the vold.fstab and flash back along with your new EBR1. An easier way, after reflashing via SPFlash tools to recover the brick, as long as one did download, from the play store, a
nandroid backup. The backup saves your system as a system.tar. Open the system.tar file, locate the vold.fstab in /etc/ edit it with an editor, repack to the tar. You could then flash the new EBR1, with all other backups in SPFlash tools, boot into recovery, then restore your tablet to the last settings using the nandroid backup.
As for the SDcard part to work, it may have to be formatted as fat32 or unallocated, this way the EBR1 will write the needed numbers to the area, bad news, you would have to figure out how to:
- partition the sdcard off and get your vold.fstab to recognize the amount of leftover storage you want it to read as phone storage. The tablet may not recognize the remaining SDCARD storage as phone storage if formatted as unallocated. Also, the EBR1 may not be able to extend to storage that is already formatted as fat32, it works for the phone storage, just not sure about the SDCARD theory.
- use the entire SDcard as extended app storage, then buy yourself one of those USB memory sticks, it can be plugged into the tablet's USB port and the other end into your PC's USB Port. Not sure how most of these tablets work with the USB stick method, probably is another vold.fstab issue.


